Our Location
5th Floor, Huake Center, Lanshan District, Linyi City, Shandong Province, China

5th Floor, Huake Center, Lanshan District, Linyi City, Shandong Province, China
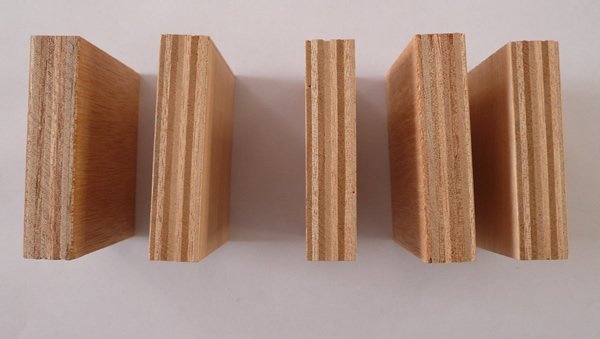
A plywood l counter covers a kitchen, a shop, or a reception in an L shape that follows two walls, and the panel choice decides whether it stays flat for years. The corner carries the load and the water from both runs, so the build needs the right gauge, a solid joint, and a sealed surface. This guide covers the panel, the base, the join, and the moisture plan for a counter that lasts.
A plywood l counter needs a flat, stable panel that holds a load and resists a spill. The L shape joins two runs at a corner, so the panel carries the weight of both and takes water where the runs meet. A stable core keeps the top flat, and a sealed face keeps the water out.
The counter demands a few things from the panel:
A stable core means a solid veneer plywood rather than a filled or particle board, because the top must hold a heavy appliance and stay flat across the corner. A wavy top shows through a laminate and spoils the whole run, so the buyer who picks a stable panel protects the finish.
Consequently, the panel sets the build. A buyer who starts with a flat, solid sheet builds an l counter that stays true, while one who saves on the core pays for a sag that no edge strip can hide.
A buyer who plans the finish before the panel saves a second pass, and the counter reads as one solid top from wall to wall. That planning sets the build before the first cut, and it keeps the seams tight across the whole run. A little forethought here saves hours at the finish stage.
The gauge and the face follow from the load and the finish, and a buyer who fixes both builds a top that carries the job. The counter takes a heavy load at the base and a spill at the surface, so the panel must hold both.
| Part | Typical panel |
|---|---|
| Counter deck | 18 mm, solid core |
| Base frame | 18 mm, solid core |
| Backing and drawer box | 12 to 18 mm |
| Peninsula overhang | 18 mm plus a brace |
Next, the deck gauge carries the top load. A deck of 18 mm holds a normal kitchen load across a base cabinet, and a peninsula that overhangs needs a brace or a thicker sheet to stop the sag. The buyer who matches the deck to the load keeps the top flat.
In contrast, the face sets the finish. A laminate or a veneer bonds to a smooth plywood deck, while a raw face needs a fill and a sand before a paint or an oil. A buyer who plans the finish from the start picks the face and skips a second pass.
Furthermore, the bond matters under a sink. Water reaches the panel at the cutout more than anywhere else, so a weather-bond panel holds through a leak better than a dry-bond one. The kitchen, not the room, decides the bond.
The base carries the top and holds it flat, and the L shape needs a support at the corner where the two runs meet. A frame that runs both ways spreads the load and keeps the deck from a dip at the bend.
A solid base uses a few parts:
The inner corner carries the most load, because both runs meet there and a person may lean on the bend. A post or a solid panel under that point holds the deck flat, and a buyer who plans the support keeps the corner from a slow dip under a heavy load.
In contrast, a base built in two separate runs leaves the corner weak and lets the deck sag at the bend. A buyer who ties the two runs with a shared rail or a corner post spreads the load and stops the dip before it shows in the top.
Next, keep the base square. The corner sets the whole counter, so a base out of square throws off the doors and the top. A buyer who checks the diagonal of the base before the deck goes on keeps the run true from wall to wall.
The butt joint of the two runs decides how the top behaves over time, and the join needs more than glue at the seam. A solid joint shares the load and keeps the two runs flat as one top.
A strong join uses a few steps:
A spline or a rail under the seam bridges the two runs and stops the edge from lifting. The glue holds the seam, and the rail carries the load, so the top reads as one piece rather than two boards meeting at a gap. The buyer who plans the rail builds a joint that lasts.
In contrast, a seam joined with glue alone pulls apart as the panel moves with the air. The rail takes that movement and holds the top flat, while a bare seam shows a ridge within a season. The rail, not the glue, keeps the seam true.
Next, clamp the seam flat while the glue sets. A clamp holds the two runs level at the joint, and the buyer who checks the flat before the glue grabs keeps the seam true. The clamp and the rail work together to lock a flat, strong join.
Water ruins a counter at the cutout, the seam, and the raw edge, so the moisture plan covers all three. A sealed surface and a sealed edge keep the panel dry, and the buyer who plans the seal from the start extends the life of the top.
| Point | Protection |
|---|---|
| Sink cutout | Seal the exposed edge |
| Seam | Glue and seal the join |
| Raw edge | Edge strip and sealer |
| Underside | A coat of sealer |
The sink cutout takes the most water, so the exposed edge there needs a sealer before the sink drops in. A buyer who seals the cutout holds the panel against a slow leak, while one who leaves it raw finds a swollen edge within a season.
Furthermore, seal the underside. Steam and splashes reach the bottom of the counter as much as the top, and a coat of sealer on the underside keeps the panel stable from both faces. That balance stops the warp that comes from a one-sided seal.
Therefore, treat the whole panel, not just the top. A buyer who seals the cutout, the seam, the edge, and the underside builds an l counter that resists the kitchen and stays flat for years.
For the deck and the base, a solid sheet such as Commercial Plywood holds the load and stays flat. A finished face like Melamine Plywood skips the laminate and speeds the install, while a weather-bond skin such as Film Faced Plywood takes the water under a sink. Pick the face to the finish and the bond to the room.
The questions below come up on any counter build, and each has a short answer.
A flat, solid-core panel at 18 mm for the deck and the base. Avoid a filled or particle core, which can sag.
Use a post or a solid panel at the inner corner, plus a shared rail. The corner carries the most load, so it needs the most support.
Cut both square, fit a spline or a rail under the seam, glue and clamp it flat, and screw down into the rail.
At the sink cutout first, then the seam and the raw edge. Seal all three, and coat the underside too.
A weather-bond panel holds up best under a sink, where water reaches the panel more than anywhere else.
A weather-bond panel and a sealed cutout keep the counter sound for years, and the surface stays flat across the whole run.
For commercial and residential projects where long-term performance matters, HYY offers engineered stone-coated metal roofing solutions backed by dedicated project support and export experience.